All Categories
Featured
Table of Contents
- – Rv Repair Shops Near My Location Garden Grove, CA
- – OCRV Center
- – Motorhome Service And Repair Near Me Garden Gr...
- – Motorhome Generator Repair Near Me Garden Grov...
- – Rv Repair And Service Near Me Garden Grove, CA
- – Rv Repair Centers Near Me Garden Grove, CA
- – Camper Ac Repair Near Me Garden Grove, CA
- – Motorhome Repair Service Garden Grove, CA
- – Rv Plumbing Repair Near Me Garden Grove, CA
- – Rv Repair In My Area Garden Grove, CA
- – Motorhome Refrigerator Repair Garden Grove, CA
- – Motorhome Generator Repair Near Me Garden Gr...
- – Motorhome Refrigerator Repair Garden Grove, CA
- – Motorhome Refrigerator Repair Garden Grove, CA
- – OCRV Center
Rv Repair Shops Near My Location Garden Grove, CA
Stick to a set up upkeep strategy and address any type of problems promptly to stay clear of issues throughout travel. Whether you're establishing off on your following journey or simply returning from one, call us at 704-257-6420 - Garden Grove Rv Repair In My Area. Our group will be delighted to answer any kind of inquiries you might have and arrange a consultation at your ease
Web page not located! Sorry the page you are looking for may have been moved or erased.
Motorhome Service And Repair Near Me Garden Grove, CA
Whether you require something as easy as a new set of tires or you're experiencing a problem that you can not fairly determine, our seasoned solution group will certainly finish the job successfully yet successfully. You'll have the ability to venture out when driving immediately. Dealing with a motor home is dramatically different than dealing with a car.

Exactly how often you service your RV depends largely on exactly how typically you utilize it. If you utilize your motor home or trailer regularly, it's secure to have it took a look at every 3,000 miles. If you're a seasonal motor home user, you'll wish to have every little thing looked into as soon as every six months, particularly after the motor home has actually been stored for an extended period of time.
Tighten lug nuts before you triggered when traveling in your recreational vehicle. Keep a close eye on the tire stress of your recreational vehicle or trailer. Inspect the battery and water system of your motor home before every usage. No, Motor homes and trailers can not be serviced at any type of solution center. It's ideal to have your RV or trailer took a look at by a team of experts that specialize in recreational vehicle maintenance and repair services.
Motorhome Generator Repair Near Me Garden Grove, CA
We use the same high-quality components that your motor home was initially developed with to make certain that it keeps its efficiency and the financial investment you made in it. The exact same premium parts and accessories that we use in our solution facility are also readily available for purchase via our components department. If you wish to take the reins for a DIY service project, we have you covered.
If you're included in a mishap with your Motor home or trailer, you can count on our customized service team. In our crash facility, we're geared up to take care of damages and damages big and small.
Motorhome damage is never fun, yet view on the bright sideyou have actually a qualified recreational vehicle repair service store near Columbia that looks out for your benefits. You may not reside in the location, yet LF Truck Repair still wants to make you one of our happy clients. As a second-generation household service, our online reputation implies whatever to us.
Rv Repair And Service Near Me Garden Grove, CA
Senior Ford focuses on regional motorhome and motor home repair work and service. There is a reason RV and motorhome suppliers in locations like Warren, Auburn Hills, Mt. Clemens and Brighton send their consumers to Senior Ford for any type of necessary fixings to their Ford framework and service. Right here in Troy, we have the called for on-site upkeep tools and capacity to handle motor home or motorhome fixings that a local car fixing shops or a vehicle dealership simply can not deal with.
Enable us to bother with your motorhome or recreational vehicle, so you will certainly not have to worry!.
Rv Repair Centers Near Me Garden Grove, CA
If there is a breakdown, you can pick your repair place. Call us today for a customized quote. * Premium showed based on a typical month-to-month payment amount for current traveling trailer policies January via June 2021.
That convenience comes with intricacy. From engine and electrical systems to plumbing, sliders, and awnings, your Motor home combines a vehicle's mechanics with a little residence's systems.
Camper Ac Repair Near Me Garden Grove, CA
Before logging miles on the freeway, guarantee your recreational vehicle's powertrain is in leading shape. This includes liquid checks, belts and hose pipe evaluations, and inspections for leaks or unusual sounds. Whether you're running gas or diesel, long hauls demand a well-maintained system. Inside lighting, outlets, refrigerator, and A/C all depend on your recreational vehicle's electrical health and wellness.
Tire stress, alignment, brake pads, and suspension all take a beating over time. Inspect for appropriate slider procedure, roof covering sealant problems, and awning stability to avoid leaks, jams, or structural damage.
Motorhome Repair Service Garden Grove, CA
Whether you're obtaining prepared for the season or require an evaluation mid-trip, we're right here to assist you stay road-ready. Summer isn't the time for shocks on the roadway.
High quality, value, and development are the core values that have been a part of the Gulf Stream Coach means of working since it was started in Nappanee, Indiana, by Jim Shea and his boys. Today Gulf Stream Train is the market's leading family-owned, family-operated motor home producer, incorporates 22 brand names with over 140 various models all gave you by the most committed and skilled group of affiliates in the market.
Using residential-style studs, rotated fiberglass insulation, and aluminum house siding for time-honored toughness and economy, in sizes from 20 ft. to 41 ft., our Key Line trailers are for committed RVers that know what they want and identify high quality. Suitable for first-timers, value-oriented, and casual campers, combining affordable rates with rugged yet light-weight go-anywhere building.
Rv Plumbing Repair Near Me Garden Grove, CA
nuCamp has been making teardrop trailers and small campers since 2004, which puts us ahead of the small living trend. Now is the best time to upgrade from outdoor tents outdoor camping. Our tiny trailers, little campers, and pick-up vehicle campers are designed to go off the grid, allowing you to explore off the ruined course and take the road much less taken a trip.
Influenced by European impacts, our campers feature a modern-day appearance that will certainly capture everyone's eye. These tiny, small campers let you bring the comforts of home when driving without compromising on quality. nuCamp's owner, Joe Mullet, has actually passionately cultivated a society of authentic take care of both our employee and the campers we craft for our cherished clients.
Our committed group participants take terrific satisfaction in maintaining honesty and pressing the boundaries of innovative layout. Our undeviating mission is to develop amazing Recreational vehicles for our exceptional consumers.
Rv Repair In My Area Garden Grove, CA
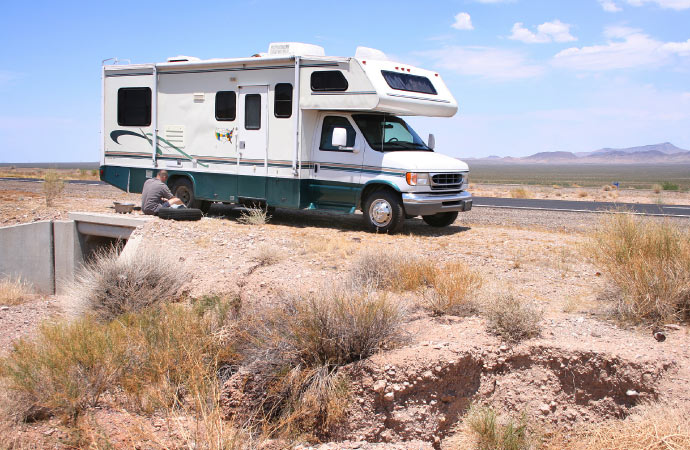
My household and I have actually been taking a trip for the past 3 weeks in the RV. We have had dreadful good luck up until this factor with our Motor home. Needless to say, many tows and solution repair service work.
We felt comfortable and at simplicity below! I would extremely recommend this shop to anybody. The quality, interaction, and cost was just what we needed! Thanks to all who helped!.
Motorhome Refrigerator Repair Garden Grove, CA
Gives even more flexibility with accessibility to a smaller sized, second cars and truck for discovering and extra space. Supplies the very best rent-and-go alternative and permits simpleness when it comes to establishing camp, simply move the recreational vehicle into park.
Be certain to look us up throughout your travels backwards and forwards the eastern shore while your having a blast camping and seeing the websites. We are comfortably located just over 30 miles west of the Chesapeake Bay and we are pleased to be of service (Garden Grove Rv Repair In My Area). Our Service Location in Maryland Consists Of: Waldorf St
Getting you right into your brand name brand-new Course An Electric motor Coach while making it a smooth process is always our number # 1 goal. Utilize our recreational vehicle Finder tool to locate the nearest Motorhome Dealer that offers Fleetwood Recreational vehicles near you. Locate local motor trainer dealerships, contact details & directions to the storage room dealer.
And also, you can find RV service specials that can help you save! Our expert certified professionals will certainly take exceptional treatment of your RV and have you back when traveling. We are the top headquarters for motor home Service and Repair in the Mid-Atlantic location. View Tips Placed completely on North DuPont Highway near I-495, our service facility deals: Strategic highway accessibility Complete overnight accommodations 50 Amp electrical connections Spacious solution bays Easy in-and-out gain access to Practical waiting locations Our service center gives: Comprehensive service warranty solution Extended protection options System security prepares Part guarantees After-market assistance Transform your motor home with: Power system upgrades Environment control innovation Suspension enhancements Amusement system integration Security attribute enhancements Gain access to our full components supply featuring: Authentic OEM parts Efficiency upgrades Safety devices Convenience enhancements Technical devices Our devotion to excellence is reflected in our consumers' experiences.
Here's what one completely satisfied client shared:"My experience at Bayshore Truck Center was the most favorable, expert engagement I have had when dealing with my recreational vehicle. I purchased a brand name new 2023 Holiday Rambler Venture motorhome from a dealer in Florida. On our drive home to Maryland we noticed the gear was leaning to the right and the air compressor was continuously biking.
Motorhome Generator Repair Near Me Garden Grove, CA
Using the FCCC 24/7 application I called Gaffney for support. I wrote a solution request online and John Colagiovanni reacted to me within an hour.
We solution and repair work most significant parts consisting of LP Gas, electrical and plumbing components. Come to the Northern Virginia Motor home specialist.
Motorhome Refrigerator Repair Garden Grove, CA
gives preventative upkeep for course A and C motorhomes. Trust our qualified technicians to fix any type of interior or external system. Camp Ground Mobile Home Park Dealer (Pre-purchase Inspection) On the Side of the Roadway Any Place You May Be Within Our Service Location is another of our specializeds. Nothing is even worse than being on getaway and experiencing a failure.
Our goal is to use the finest Motor home solutions readily available at affordable rates. Happy to announce we currently provide RV sales & consignment.
Motorhome Refrigerator Repair Garden Grove, CA
I will make use of RV Repair Bear again. They took the RV right in and serviced everything while I waited as promised.
OCRV Center
Address: 23281 La Palma Ave Yorba Linda, CA 92887Phone: (714) 909-1444
Email: [email protected]
OCRV Center
I will certainly be back for maintenance in the future. The heating system in my old Toyota motorhome gave up on me. Not just did they make time within 48 hours to look at it and diagnose it, turns out they had the old board in supply!
Rv Service And Repair Near Me Garden Grove, CARv Service Repair Near Me Garden Grove, CA
Motorhome Repair Shops Garden Grove, CA
Rv Solar Installation Garden Grove, CA
Motorhome Awning Repair Garden Grove, CA
Motorhome Service And Repair Near Me Garden Grove, CA
Rv Refrigerator Repair Near Me Garden Grove, CA
Rv Repair Shops Near My Location Garden Grove, CA
Rv Repair Services Near Me Garden Grove, CA
Rv Repair Services Near Me Garden Grove, CA
Motorhome Repair Shops Garden Grove, CA
Full Service Rv Repair Near Me Garden Grove, CA
Rv Repair And Service Near Me Garden Grove, CA
Rv Solar Installation Garden Grove, CA
Rv Repair Shops Near My Location Garden Grove, CA
Rv Plumbing Repair Near Me Garden Grove, CA
Rv Repair And Service Near Me Garden Grove, CA
Rv Repair Places Near Me Garden Grove, CA
Rv Solar Panel Installation Garden Grove, CA
Motorhome Repair Shops Garden Grove, CA
Motorhome Service And Repair Near Me Garden Grove, CA
Motorhome Repair Near Me Garden Grove, CA
Motorhome Generator Repair Near Me Garden Grove, CA
Best Rv Repair Near Me Garden Grove, CA
Rv Solar Panel Installation Garden Grove, CA
Rv Refrigerator Repair Near Me Garden Grove, CA
Rv Mechanics Near Me Garden Grove, CA
Rv Generator Repair Garden Grove, CA
Rv Solar Panel Installation Garden Grove, CA
Rv Service Repair Near Me Garden Grove, CA
Rv Ceiling Repair Garden Grove, CA
Motorhome Repair Service Garden Grove, CA
Motorhome Repair Shops Garden Grove, CA
Rv Repair Centers Near Me Garden Grove, CA
Rv Repair Shops Near My Location Garden Grove, CA
Rv Repair Shops Near My Location Garden Grove, CA
Rv Refrigerator Repair Near Me Garden Grove, CA
Motorhome Refrigerator Repair Garden Grove, CA
Rv Plumbing Repair Near Me Garden Grove, CA
Motorhome Refrigerator Repair Garden Grove, CA
Rv Service Repair Near Me Garden Grove, CA
Rv Repairs Near Me Garden Grove, CA
Rv Floor Repair Near Me Garden Grove, CA
Rv Generator Repair Garden Grove, CA
Motorhome Repair Shop Garden Grove, CA
Rv Repair Service Near Me Garden Grove, CA
Motorhome Repair Shops Garden Grove, CA
Rv Repair Centers Near Me Garden Grove, CA
Rv Mechanics Near Me Garden Grove, CA
Motorhome Repair Shops Garden Grove, CA
Rv Repair And Service Near Me Garden Grove, CA
Motorhome Generator Repair Near Me Garden Grove, CA
Motorhome Refrigerator Repair Garden Grove, CA
Rv Repair Places Near Me Garden Grove, CA
Rv Service Repair Near Me Garden Grove, CA
Rv Repair Service Near Me Garden Grove, CA
Rv Floor Repair Near Me Garden Grove, CA
Rv Repair Centers Near Me Garden Grove, CA
Motorhome Generator Repair Near Me Garden Grove, CA
Camper Ac Repair Near Me Garden Grove, CA
Motorhome Service And Repair Near Me Garden Grove, CA
Rv Generator Repair Garden Grove, CA
Motorhome Repair Service Garden Grove, CA
Motorhome Generator Repair Near Me Garden Grove, CA
Best Rv Repair Near Me Garden Grove, CA
Rv Generator Repair Garden Grove, CA
Rv Repair Shops Near My Location Garden Grove, CA
Motorhome Repair Shops Garden Grove, CA
Rv Service Repair Near Me Garden Grove, CA
Rv Solar Installation Garden Grove, CA
Rv Repair Centers Near Me Garden Grove, CA
Camper Ac Repair Near Me Garden Grove, CA
Full Service Rv Repair Near Me Garden Grove, CA
Rv Service Repair Near Me Garden Grove, CA
Rv Ceiling Repair Garden Grove, CA
Motorhome Refrigerator Repair Garden Grove, CA
Motorhome Generator Repair Near Me Garden Grove, CA
Rv Repairs Near Me Garden Grove, CA
Near Seo Near Me Garden Grove, CA
Companies Near Me Seo Services For Small Business Garden Grove, CA
OCRV Center
Table of Contents
- – Rv Repair Shops Near My Location Garden Grove, CA
- – OCRV Center
- – Motorhome Service And Repair Near Me Garden Gr...
- – Motorhome Generator Repair Near Me Garden Grov...
- – Rv Repair And Service Near Me Garden Grove, CA
- – Rv Repair Centers Near Me Garden Grove, CA
- – Camper Ac Repair Near Me Garden Grove, CA
- – Motorhome Repair Service Garden Grove, CA
- – Rv Plumbing Repair Near Me Garden Grove, CA
- – Rv Repair In My Area Garden Grove, CA
- – Motorhome Refrigerator Repair Garden Grove, CA
- – Motorhome Generator Repair Near Me Garden Gr...
- – Motorhome Refrigerator Repair Garden Grove, CA
- – Motorhome Refrigerator Repair Garden Grove, CA
- – OCRV Center
Latest Posts
Mission Viejo Cheapest Insurance For Seniors
Health Insurance Plans For Family Laguna Niguel
Key Man Insurance Quote Rancho Santa Margarita
More
Latest Posts
Mission Viejo Cheapest Insurance For Seniors
Health Insurance Plans For Family Laguna Niguel
Key Man Insurance Quote Rancho Santa Margarita