All Categories
Featured
Table of Contents
- – Rv Roof Leak Repair Near Me Garden Grove, CA
- – OCRV Center
- – Rubber Roof Installation Garden Grove, CA
- – Rubber Roof For Camper Garden Grove, CA
- – Rv Trailer Rubber Roof Repair Garden Grove, CA
- – Rv Trailer Roof Repair Garden Grove, CA
- – Rubber Roof Installation Garden Grove, CA
- – Roof Repair For Rv Garden Grove, CA
- – Best Rv Roof Repair Garden Grove, CA
- – Repair Rv Roof Leak Garden Grove, CA
- – Motorhome Roof Replacement Garden Grove, CA
- – Replace Rv Roof Garden Grove, CA
- – Rv Rubber Roof Maintenance Garden Grove, CA
- – Rv Roof Replacement Garden Grove, CA
- – Best Rv Roof Repair Garden Grove, CA
- – OCRV Center
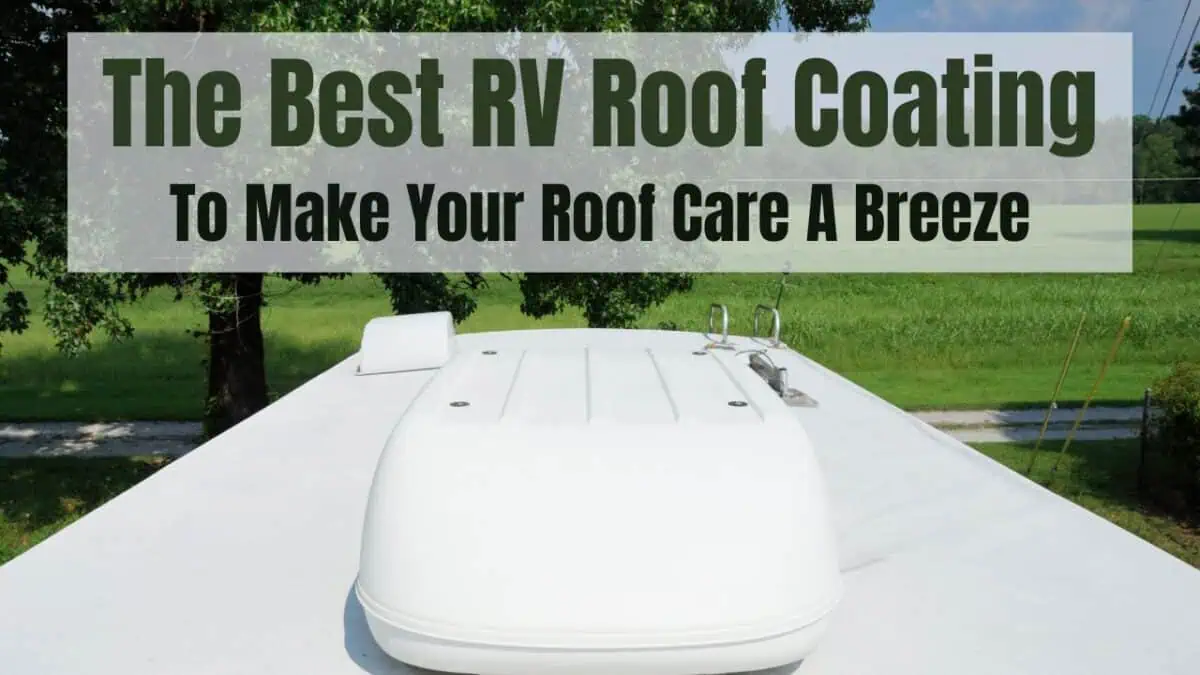
Rv Roof Leak Repair Near Me Garden Grove, CA
Diluent Water, if called for. Usage as gotten. Clean-up calls for only cozy water.
Eye get in touch with If product calls eye, flush with water for at least 15 mins and look for clinical interest immediately. Skin get in touch with If product contacts skin, wash influenced location with soap and water.
Rubber Roof Installation Garden Grove, CA

Mask both sides of joint with covering up tape. Cut nozzle to preferred bead size. Pierce seal. Tons sealer cartridge in caulking weapon. Area nozzle right into joint and use sealant into space. Use above 40 deg F (5 deg C)Smooth or "device" grain if required. Eliminate covering up tape right away. Clean hands and devices extensively before washing with soap and water.
PRECAUTIONNot for interior intake. Direct get in touch with of uncured sealant irritates eyes and might aggravate skin. In case of eye get in touch with flush eyes with water for 15 minutes and call a physician. In case of skin contact, extensively clean skin with soap and water. In situation of ingestion seek clinical focus quickly.
My motor home roofing system that needs to be changed! Invite to my Motor Home Restoration Collection!.?.!! So you desire a recreational vehicle however can't manage one. If you resemble me and have more time than cash, then probably your finest choice is to purchase an old motor home and repair it up. If you occur to discover an actually good deal, after that chances are it has water damages.
I obtain it. I purchased my RV over a year back and didn't have the digestive tracts to begin tackling this job until today. Yet I'm below to tell you, if I can do it, you can do it. Can I actually do it? Stay tuned and figure out! I acquired this 1993 Jamboree for $5000.
Rubber Roof For Camper Garden Grove, CA
Water damage! I have actually never worked on a Recreational vehicle prior to and I have to confess, I'm terrified. With any luck if you're thinking about doing this yourself, following along on my RV roof replacement project will provide you the nerve to dive in!
That appeared to be my cheapest choice.
I figured I would certainly instead have it semi-portable so I went with the canopy, plus this enables me to adjust the elevation up and down when I need to. Naturally the cheapest choice of all would certainly be to simply throw an excellent tarpaulin over the top of your RV for wet days and only service bright days! Initially I raised the legs with 1 1/2 PVC pipeline that fit inside the legs and afterwards I attached a hose pipe clamp around the PVC pipeline to hold up the cover legs.
Rv Trailer Rubber Roof Repair Garden Grove, CA
This is still a little floppy. I probably need to have forked out for some rigid steel pipe from the begin.
An old patch work on the Recreational vehicle rubber roofing system. As you can see, this roof covering has actually had a lot of issues over the years.
I ordered an utility blade and began slicing. The very first thing I noticed is that there were 2 layers. On the bottom is the initial EPDM rubber roofing system layer. I know it's EPDM rubber and not TPO rubber since of the black backing. (TPO roof is white on both sides.) In addition to my EPDM roofing is a slim RV roof covering covering that was applied later on.
I simply left the roof covering finish stuck to the EPDM roofing and pulled them up with each other. Beginning to peel off roofing system layer.
Rv Trailer Roof Repair Garden Grove, CA
I reduced lines with an energy knife around components. All rubber roofing removed from camper. This action went pretty quickly. There was an adhesive under the bottom layer of rubber that was still quite well embeded lots of locations, however with a great little force it peeled off up easily.
Now I could see all the damaged plywood roof outdoor decking underneath. I selected to peel off the rubber before getting rid of components simply so I might see what I was dealing with.
Rubber Roof Installation Garden Grove, CA
If you assume you'll be saving the roof decking plywood (not replacing it), then you may save on your own some cleaning problem by eliminating the components first and after that peeling up the rubber! Detail of water damage on camper roof. Extra water harmed areas on RV roofing system decking. There was absolutely nothing truly dreadful that made me feel like I was going to drop via, yet absolutely a lot of damage and I was obtaining the feeling I would certainly be changing a great deal of the roof covering outdoor decking plywood.
I chose the simplest one initially, an air vent cap from a cooking area sink plumbing air vent pipe. Starting to scratch caulk and sealer. I used a stiff scrape with a chisel-like blade and simply started prying and damaging and scratching and hacking. There is no other way around this, you just need to begin digging till you expose the screw heads.
Unscrewing the screws in air vent cap. The screws on this air vent cap were hex-head metal screws so I used a tiny socket chauffeur to remove them. Some appeared clean. Others were rusted and I needed to make use of a vice-grip pliers to order the heads and transform them gradually.
Roof Repair For Rv Garden Grove, CA
I uncovered an old wasp nest inside the air vent cover. This is a view I'll possibly need to obtain made use of to, locating the remains of animal habitation high and low. I invest a horrible great deal of my time creating excellent wildlife habitat in my backyard so I do not obtain angered when a creature chooses to establish up home in my RV.
Thankfully no one was home in this old nest so I simply threw it. You ought to attempt not to harm these pieces (like vent covers and caps) as you're scraping off the old caulk and sealer just in instance you require to utilize them again.
My roofing air vent likewise had a vent cover over it. Starting on the roof vent. Equipment exposed on roofing vent cap, the very first nut came off tidy.
The fasteners on this RV roofing air vent cover were nuts on tiny screws. The 2nd one just began rotating, meaning the screw was not repaired in location however turning along with the nut. A peek at the equipment holding down the roofing air vent cover.
Best Rv Roof Repair Garden Grove, CA
I didn't have any type of good means to hold the screw in position so instead I decided to saw with the screws with a reciprocating saw. Sawing through bolts on roof air vent cover. I utilized a cordless reciprocating saw with a metal-cutting blade however it was tricky to obtain the blade flat adequate to reach the bolts so close to the roofing system deck.
Bending the blade a little bit to reach near to the roofing deck. When I had actually sawn with the continuing to be 3 screws, I tore up the cover. Rv Roof Replacement Garden Grove. The brackets that were holding the cover in position. Cover gotten rid of from roofing system air vent. Then I loosened the brackets from the flange of the vent fan itself.
Repair Rv Roof Leak Garden Grove, CA
Most were so old and rusted that they sheared off when I unscrewed after that with a great deal of force. Unscrewing the braces that held the air vent cover in position. I scratched more caulk and roofing system sealer off the flange of the roof covering vent itself. I soon discovered there were no more screws or equipment holding it down so I surrendered on the scraping and went inside the RV After scraping the caulk and sealer from flange of roofing air vent, no even more screws! Unscrewing the within cover plate of roofing air vent follower in RV shower room.
I chose a drill bit close to the size of the shaft of the screws that I had actually already pulled out and began boring. Selecting a drill bit for drilling out a screw head.
Instead of popping off the screw head, the plastic just melted away around the hot screw head. Hope I don't have to reuse this cover.
Lifting off the old roofing vent. There are 2 cords running to the roof vent (a black warm cord and a white neutral cable) that you'll need to clip to remove the old air vent.
Motorhome Roof Replacement Garden Grove, CA
These are the cables linking the roofing system venting fan. I clipped them simply over heaven splice joints. Roofing system vent gotten rid of and tidied up. After clipping the cord and getting rid of the vent, I tidied up any kind of remaining goop and got my initial great look at the roofing system structure. It's steel! 1 1/2 inches thick.
Some Motor home roofs are mounted with wood, others have metal framing. I scuffed off some corrosion and made a huge mess inside the restroom.
Replace Rv Roof Garden Grove, CA
Oops. Maybe I should have put a tarp down. My last goal of the day was to obtain the refrigerator vent cover off. I noticed RV sealant balls at 4 points on the cover so thought there have to be screws under them. I pried them up and located Phillips screw heads.
Subjecting the screws in the fridge air vent cap. Removing old motor home roofing system finish on top of refrigerator vent cap I also saw that there was a coat of RV roof layer over the air vent cap. These coatings are repainted on with a brush so clearly whoever did this covering just blobbed know top of everything.
Some screws will certainly be too rusted and call for pliers to get rid of. Tearing off the refrigerator roof vent after all screws are removed. (and the devices made use of.) Virtually every screw was in sufficient problem to remove with an outlet vehicle driver, however a couple were also rustic and required to be turned out with vice hold pliers.
I peeled off the remaining rubber roof from under the flange and afterwards scraped off the old putty under. I'll clean it far better if and when I decide to reuse it. Appears like it remains in good form so I possibly will. Scratching off the old putty from the flange of the refrigerator roof air vent.
Rv Rubber Roof Maintenance Garden Grove, CA
Whether you simply drove off the car dealership's whole lot or you've possessed your camper for many years, you know that your roofing system isn't under service warranty. Hence, you may desire to get your trailer's roofing changed for the Life time Guarantee and tranquility of mind. And we're accredited through the Recreational Lorry Industry Organization (RVIA) to fix and change Recreational vehicle roofs.
Dicor's Rubber Roof Repair work Membranes are self-adhesive strips of EPDM rubber that fixings splits, is very resistant to degeneration and has exceptional water resistance. And also, it contains no asphalt, solvent of VOCs, making it eco-friendly.
Tearing off the refrigerator roof covering vent after all screws are eliminated. Virtually every screw was in good adequate problem to eliminate with an outlet motorist, but a pair were as well rusty and needed to be turned out with vice grasp pliers.
I peeled off the staying rubber roofing system from under the flange and after that scratched off the old putty beneath. Scuffing off the old putty from the flange of the refrigerator roof covering air vent.
Rv Roof Replacement Garden Grove, CA
That's regarding I hopped on day 1 after regarding 5 hours of lazy work. Not a negative start. I likewise discovered this amazing sludge mold and mildew expanding in the mulch under the camper. If you have actually never seen a slime mold, look into some time lapses of them growing! They are freaking fantastic! A sludge mold under the camper! Currently proceed to step 2 when I get rid of the remainder of the roof components!.
?.!!. Whether you simply repelled the dealer's lot or you have actually possessed your camper for several years, you recognize that your roof isn't under service warranty. Hence, you might desire to obtain your trailer's roof changed for the Life time Guarantee and satisfaction. You do not desire to mess around with a great deal of sales men, either.
Best Rv Roof Repair Garden Grove, CA
Motor Home Roofing System Repair Florida has served the entire state of Florida for the previous three decades and has been functioning exclusively on roof covering repair and replacement. And we're accredited with the Recreational Car Market Association (RVIA) to fix and replace RV roofs. When you get in touch with, you'll get a free inspection of your roof covering in our Palm City RV Solution Center location.
Dicor's Rubber Roof covering Repair work Membranes are self-adhesive strips of EPDM rubber that repair work splits, is very resistant to wear and tear and has exceptional water resistance. Plus, it contains no asphalt, solvent of VOCs, making it ecologically pleasant.
Rv Roof Leak Repair Near Me Garden Grove, CARubber Roofing For Rv Garden Grove, CA
Rubber Roof Installation Garden Grove, CA
Rubber Roof Installation Garden Grove, CA
Rv Roof Repair Near Me Garden Grove, CA
Rubber Roof For Camper Garden Grove, CA
Repair Rv Roof Leak Garden Grove, CA
Class C Rv Roof Repair Garden Grove, CA
Rv Roof Leak Repair Garden Grove, CA
Rv Roof Leak Repair Near Me Garden Grove, CA
Epdm Rv Roof Repair Garden Grove, CA
Best Rv Roof Repair Garden Grove, CA
Rv Roof Replacement Garden Grove, CA
Rv Trailer Roof Repair Garden Grove, CA
Rv Roof Leak Repair Garden Grove, CA
Rv Roof Repair Near Me Garden Grove, CA
Repair Rv Roof Garden Grove, CA
Rubber Roofing For Rv Garden Grove, CA
Rv Roof Repair Fiberglass Garden Grove, CA
Rubber Roof Installation Garden Grove, CA
Class C Rv Roof Repair Garden Grove, CA
Rv Roof Leak Repair Near Me Garden Grove, CA
Rv Fiberglass Roof Repair Garden Grove, CA
Rv Rubber Roof Replacement Garden Grove, CA
Class C Rv Roof Repair Garden Grove, CA
Rubber Roof For Camper Garden Grove, CA
Rv Roof Leak Repair Near Me Garden Grove, CA
Rv Roof Repair Fiberglass Garden Grove, CA
Epdm Rv Roof Repair Garden Grove, CA
Rv Rubber Roof Replacement Cost Garden Grove, CA
Rubber Roof For Rv Garden Grove, CA
Best Rv Roof Repair Garden Grove, CA
Rv Slide Out Roof Repair Garden Grove, CA
Epdm Rv Roof Repair Garden Grove, CA
Rv Roof Repair Fiberglass Garden Grove, CA
Rv Roof Repair Fiberglass Garden Grove, CA
Rubber Roofing For Campers Garden Grove, CA
Rv Fiberglass Roof Repair Garden Grove, CA
Rv Rubber Roof Maintenance Garden Grove, CA
Resealing Rv Roof Garden Grove, CA
Rv Rubber Roof Replacement Garden Grove, CA
Rv Rubber Roof Replacement Garden Grove, CA
Rubber Roof Installation Garden Grove, CA
Rv Roof Leak Repair Near Me Garden Grove, CA
Rv Rubber Roof Replacement Garden Grove, CA
Rv Rubber Roof Maintenance Garden Grove, CA
Rv Roof Maintenance Garden Grove, CA
Best Rv Roof Repair Garden Grove, CA
Rv Rubber Roof Replacement Cost Garden Grove, CA
Rv Rubber Roof Replacement Cost Garden Grove, CA
Resealing Rv Roof Garden Grove, CA
Rv Trailer Roof Repair Garden Grove, CA
Rv Roof Repair Garden Grove, CA
Epdm Rv Roof Repair Garden Grove, CA
Rv Roof Repair Fiberglass Garden Grove, CA
Rv Trailer Roof Repair Garden Grove, CA
Rv Rubber Roof Replacement Cost Garden Grove, CA
Rv Roof Maintenance Garden Grove, CA
Rv Rubber Roof Maintenance Garden Grove, CA
Rv Rubber Roof Repair Garden Grove, CA
Rv Rubber Roof Replacement Garden Grove, CA
Rubber Roofing For Campers Garden Grove, CA
Rubber Roof For Rv Garden Grove, CA
Rv Roof Repair Garden Grove, CA
Rv Roof Replacement Garden Grove, CA
Rv Roof Repair Fiberglass Garden Grove, CA
Repair Rv Roof Garden Grove, CA
Motorhome Roof Replacement Garden Grove, CA
Rv Roof Leak Repair Garden Grove, CA
Rubber Roofing For Campers Garden Grove, CA
Rubber Roof Installation Garden Grove, CA
Resealing Rv Roof Garden Grove, CA
Repair Rv Roof Leak Garden Grove, CA
Motorhome Roof Replacement Garden Grove, CA
Best Rv Roof Repair Garden Grove, CA
Resealing Rv Roof Garden Grove, CA
Rv Rubber Roof Repair Garden Grove, CA
Rubber Roof For Camper Garden Grove, CA
Companies Near Me Seo Expert Garden Grove, CA
Near You Seo Expert Garden Grove, CA
Rv Roof Replacement Garden Grove, CA
OCRV Center
Table of Contents
- – Rv Roof Leak Repair Near Me Garden Grove, CA
- – OCRV Center
- – Rubber Roof Installation Garden Grove, CA
- – Rubber Roof For Camper Garden Grove, CA
- – Rv Trailer Rubber Roof Repair Garden Grove, CA
- – Rv Trailer Roof Repair Garden Grove, CA
- – Rubber Roof Installation Garden Grove, CA
- – Roof Repair For Rv Garden Grove, CA
- – Best Rv Roof Repair Garden Grove, CA
- – Repair Rv Roof Leak Garden Grove, CA
- – Motorhome Roof Replacement Garden Grove, CA
- – Replace Rv Roof Garden Grove, CA
- – Rv Rubber Roof Maintenance Garden Grove, CA
- – Rv Roof Replacement Garden Grove, CA
- – Best Rv Roof Repair Garden Grove, CA
- – OCRV Center
Latest Posts
Affordable Home Insurance For Seniors San Juan Capistrano
Senior Insurance Companies Laguna Beach
Huntington Beach Medicare Part D Plans Near Me
More
Latest Posts
Affordable Home Insurance For Seniors San Juan Capistrano
Senior Insurance Companies Laguna Beach
Huntington Beach Medicare Part D Plans Near Me