All Categories
Featured
Table of Contents
- – Repair Rv Roof Mira Loma, CA
- – OCRV Center
- – Rubber Roof For Rv Mira Loma, CA
- – Rv Roof Leak Repair Mira Loma, CA
- – Rubber Roofing For Rv Mira Loma, CA
- – Rubber Roof For Rv Mira Loma, CA
- – Rubber Roof For Camper Mira Loma, CA
- – Rv Rubber Roof Repair Mira Loma, CA
- – Rv Trailer Roof Repair Mira Loma, CA
- – Rv Roof Repair Near Me Mira Loma, CA
- – Epdm Rv Roof Repair Mira Loma, CA
- – Rubber Roof For Camper Mira Loma, CA
- – Replace Rv Roof Mira Loma, CA
- – Rv Fiberglass Roof Repair Mira Loma, CA
- – OCRV Center
Repair Rv Roof Mira Loma, CA
I figured I prefer to have it semi-portable so I selected the cover, plus this enables me to adjust the elevation backwards and forwards when I require to. Of course the least expensive alternative of all would certainly be to simply throw an excellent tarpaulin over the top of your motor home for rainy days and just job on warm days! Initially I increased the legs with 1 1/2 PVC pipe that fit inside the legs and afterwards I attached a tube clamp around the PVC pipe to hold up the canopy legs.
This is still a little drooping. I probably ought to have forked out for some inflexible steel pipeline from the beginning.
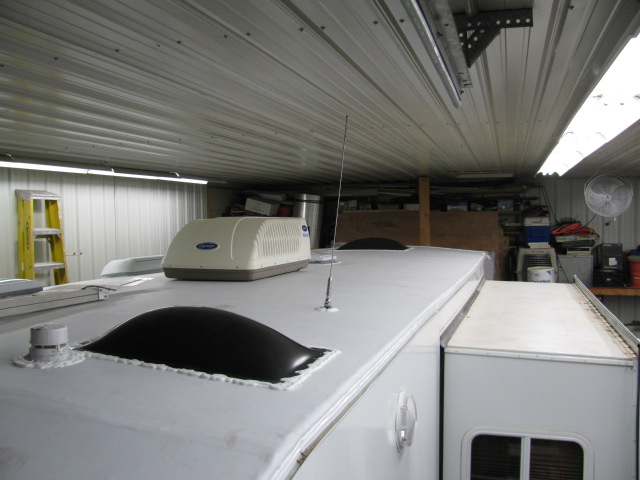
Splits in the EPDM roof at side of camper (Rubber Roof For Rv Mira Loma). An old patch job on the recreational vehicle rubber roof covering. Tons of caulk stacked over old problem areas. As you can see, this roof has had a whole lot of problems throughout the years. Looking from the inside of the camper there have actually clearly been leakages in numerous locations of the roof covering.
I got hold of an energy blade and started slicing. The very first thing I noticed is that there were two layers. On the bottom is the initial EPDM rubber roofing layer. I understand it's EPDM rubber and not TPO rubber as a result of the black backing. (TPO roofing is white on both sides.) In addition to my EPDM roofing system is a slim RV roof covering covering that was applied later on.
Rubber Roof For Rv Mira Loma, CA
I just left the roofing finishing stayed with the EPDM roof and pulled them up together. (You do not need to peel them up independently.) Starting to peel off roofing layer. Peeling off up section of the lower layer of rubber. This reveals that the original motor home roofing system was EPDM due to the black support.
All rubber roof gotten rid of from camper. There was an adhesive under the lower layer of rubber that was still pretty well stuck in numerous areas, but with an excellent little bit of pressure it peeled up cleanly.
If you believe you'll be conserving the roof outdoor decking plywood (not replacing it), after that you could conserve on your own some clean-up problem by eliminating the fixtures initially and after that peeling up the rubber! Information of water damages on camper roof. A lot more water damaged locations on RV roofing decking. There was nothing actually terrible that made me feel like I was mosting likely to drop via, however certainly a great deal of damages and I was obtaining the sensation I would be replacing a lot of the roofing system outdoor decking plywood.
Rv Roof Leak Repair Mira Loma, CA
I went for the simplest one initially, an air vent cap from a kitchen sink pipes vent pipe. There is no various other way around this, you just have to start excavating until you subject the screw heads.
Unscrewing the screws in vent cap. The screws on this air vent cap were hex-head steel screws so I used a little socket motorist to remove them.
I found an old wasp nest inside the air vent cover. This is a sight I'll most likely have actually to obtain used to, finding the remains of pet habitation in every space and cranny. I spend a dreadful great deal of my time developing excellent wild animals habitat in my yard so I do not obtain annoyed when an animal chooses to set up home in my RV.
Rubber Roofing For Rv Mira Loma, CA
Fortunately no one was home in this old nest so I simply threw it. Maybe I'll place a screen over it when changing it. Which brings us to the following point. You need to attempt not to damage these items (like vent covers and caps) as you're removing the old caulk and sealer simply in case you need to utilize them once again.
My roof covering air vent additionally had an air vent cover over it. Beginning on the roofing vent. Equipment exposed on roofing air vent cap, the first nut came off tidy.
Screw is rotating. The bolts on this RV roofing air vent cover were nuts on small screws. The initial one came off fine with an expansion outlet kit. The second one just started rotating, suggesting the screw was not taken care of in area yet turning in addition to the nut. Bummer. A peek at the hardware holding down the roofing vent cover.
Rubber Roof For Rv Mira Loma, CA
I didn't have any type of excellent method to hold the bolt in place so instead I decided to saw via the screws with a reciprocating saw. Sawing through bolts on roof covering air vent cover. I made use of a cordless reciprocating saw with a metal-cutting blade but it was difficult to obtain the blade level enough to get to the screws so near to the roofing system deck.
Bending the blade a little bit to get to close to the roof deck. Cover removed from roofing system air vent.
I scuffed more caulk and roof covering sealant off the flange of the roofing vent itself. I soon uncovered there were no much more screws or hardware holding it down so I provided up on the scuffing and went inside the Motor home After scratching the caulk and sealant from flange of roofing vent, no more screws!
Rubber Roof For Camper Mira Loma, CA
A pair sheared off with a great deal of force, yet two would not budge. I had to pierce out the screw heads. I chose a drill little bit near the dimension of the shaft of the screws that I had actually already taken out and began exploration. Selecting a drill bit for piercing out a screw head.
Safety and security glasses suggested. I drilled out the heads, one popped off and the various other I was getting annoyed with and provided it a pull before it was pierced via. Instead of standing out off the screw head, the plastic just thawed away around the hot screw head. Whoops. Hope I do not need to recycle this cover.
All edge brackets eliminated, all set to take out. As soon as the braces were out I returned up leading to pry out the the roof covering vent. I scuffed up all the staying cruds and rubber roof covering. Raising off the old roofing system air vent. There are 2 wires running to the roofing system vent (a black warm wire and a white neutral cord) that you'll require to clip to eliminate the old air vent.
Rv Rubber Roof Repair Mira Loma, CA
These are the cables attaching the roof covering venting fan. I clipped them simply over the blue splice joints. Roof air vent removed and cleansed up. After clipping the wire and removing the vent, I cleansed up any continuing to be goop and obtained my very first great appearance at the roof covering framework. It's metal! 1 1/2 inches thick.
Some RV roofings are mounted with timber, others have steel framework. I scraped off some corrosion and made a huge mess inside the shower room.
My final goal of the day was to obtain the fridge vent cover off. I observed RV sealer balls at 4 factors on the cover so assumed there should be screws under them.
Subjecting the screws in the refrigerator vent cap. Removing old recreational vehicle roof covering layer in addition to refrigerator vent cap I also discovered that there was a coat of recreational vehicle roof coating over the air vent cap. These layers are painted on with a brush so plainly whoever did this finish just blobbed in on top of whatever.
Rv Trailer Roof Repair Mira Loma, CA
Lifting off the cover of the refrigerator roof air vent. Cutting away extra rubber and scuffing off RV roof sealant and old caulk. Scuffing lap sealer and caulk from screw heads.
Some screws will be too rusted and require pliers to get rid of. Prying off the refrigerator roof covering air vent nevertheless screws are gotten rid of. (and the devices made use of.) Almost every screw was in sufficient problem to eliminate with a socket driver, but a couple were also corroded and required to be twisted out with vice grasp pliers.
Rv Roof Repair Near Me Mira Loma, CA
I peeled off the continuing to be rubber roof covering from under the flange and after that scraped off the old putty underneath. I'll cleanse it much better if and when I choose to reuse it. Appears like it remains in respectable form so I possibly will. Removing the old putty from the flange of the refrigerator roof covering vent.
That's as much as I got on day 1 after concerning 5 hours of lazy job. Over time, your Motor home's roofing can end up being used, harmed, or create leakages, which can endanger its honesty and lead to more considerable problems. If you're experiencing any of these issues, it may be time to think about changing your Motor home roof.
There are several indicators that indicate your motor home calls for a roof covering replacement. These indications consist of water leaks, sagging or soft places on the roof covering, cracks or divides in the roofing material, too much deterioration, and visible sunshine coming through the roofing. If you notice any one of these signs, it is vital to address them without delay to stop more damages to your motor home.
Epdm Rv Roof Repair Mira Loma, CA
On average, RV roofing system replacement costs can range from $2,000 to $10,000. It is essential to consider the long-lasting advantages and possible cost savings that feature purchasing a top quality roof substitute. When choosing a RV roofing system material, several factors enter play. These consist of resilience, weight, insulation properties, maintenance requirements, and expense.
Deciding in between a do-it-yourself (DIY) method or specialist setup for your recreational vehicle roofing substitute depends on your abilities, experience, and readily available time. While do it yourself setup can conserve you money, it calls for appropriate knowledge and expertise to make certain an appropriate and leak-proof setup. On the other hand, professional installment offers the advantage of expertise, experience, and guarantees.
Evaluate and clean up the rain gutters and downspouts to guarantee appropriate drain and prevent water pooling on the roof. Apply a safety layer or sealant to the roofing system surface area as recommended by the producer. This can supply additional UV defense and aid prolong the life of the roof. Prevent strolling on the roof unless required.
The expense of installing a recreational vehicle roof covering can differ based on variables like recreational vehicle dimension, chosen roofing system product, and whether professional installment is requested. On average, you can expect to spend in between $2,000 and $10,000 for a motor home roof replacement. Yes, the roof covering of a recreational vehicle can be changed. If your recreational vehicle's roofing system is harmed, worn, or dripping, a roofing system substitute is often required to ensure the architectural honesty of your recreational vehicle.
Rubber Roof For Camper Mira Loma, CA
Repairing a rip in a Recreational vehicle roof depends on the seriousness and type of roofing product. For minor holes, you can utilize roofing system repair work tape or sealer specifically created for Motor home roofs.
Purchasing a high-grade RV roofing system covering can be worth it for long-lasting roofing system upkeep. Flex Seal products are often utilized as short-term or quick-fix solutions for little leakages or fractures. While they might provide a short-lived service, it's recommended to speak with a specialist and make use of correct RV roof repair products for a more irreversible and trustworthy fix.
Replace Rv Roof Mira Loma, CA
PVC roofings use outstanding resilience, resistance to UV rays, and reduced upkeep needs. They are considered a reliable alternative for Recreational vehicle roof coverings, but the ideal option depends on your details demands and choices.

Resealing your motor home roofing need to be done consistently to keep its stability and prevent leakages. As a general guideline, it's advised to reseal your RV roofing system a minimum of yearly or according to the maker's referrals. Whether to leave your motor home slides in or out depends on the scenario and personal choice.
Take into consideration variables such as protection, climate condition, and convenience when deciding. Motor home roofing system leakages are reasonably common due to various variables such as age, deterioration, inappropriate upkeep, or severe weather. Regular inspections and aggressive upkeep can aid reduce the event of leakages. The choice to complete a motor home because of water damage depends upon the extent of the damages and the insurance coverage firm's analysis.
Rv Fiberglass Roof Repair Mira Loma, CA
Insurance insurance coverage for recreational vehicle delamination depends upon the certain policy and the root cause of delamination. It is necessary to evaluate your insurance plan and talk to your carrier to comprehend the insurance coverage for delamination and any applicable deductibles. Declaring water damage on a camper relies on your insurance coverage policy and the scenarios surrounding the water damage.
Rv Roof Repair Mira Loma, CARv Roof Repair Mira Loma, CA
Repair Rv Roof Leak Mira Loma, CA
Rv Roof Leak Repair Mira Loma, CA
Replace Rv Roof Mira Loma, CA
Rv Trailer Rubber Roof Repair Mira Loma, CA
Rv Rubber Roof Replacement Cost Mira Loma, CA
Rubber Roofing For Campers Mira Loma, CA
Rv Fiberglass Roof Repair Mira Loma, CA
Rv Rubber Roof Replacement Mira Loma, CA
Rv Trailer Roof Repair Mira Loma, CA
Rubber Roof Installation Mira Loma, CA
Rv Roof Leak Repair Near Me Mira Loma, CA
Rv Roof Leak Repair Near Me Mira Loma, CA
Epdm Rv Roof Repair Mira Loma, CA
Rubber Roofing For Rv Mira Loma, CA
Rv Slide Out Roof Repair Mira Loma, CA
Rv Trailer Rubber Roof Repair Mira Loma, CA
Rv Roof Repair Fiberglass Mira Loma, CA
Replace Rv Roof Mira Loma, CA
Repair Rv Roof Leak Mira Loma, CA
Rv Slide Out Roof Repair Mira Loma, CA
Rv Roof Leak Repair Near Me Mira Loma, CA
Rv Roof Maintenance Mira Loma, CA
Rubber Roofing For Campers Mira Loma, CA
Rv Roof Repair Fiberglass Mira Loma, CA
Rv Rubber Roof Replacement Mira Loma, CA
Rv Roof Repair Service Near Me Mira Loma, CA
Resealing Rv Roof Mira Loma, CA
Rubber Roof For Camper Mira Loma, CA
Rubber Roof For Camper Mira Loma, CA
Rv Rubber Roof Replacement Cost Mira Loma, CA
Rv Roof Repair Fiberglass Mira Loma, CA
Rubber Roofing For Campers Mira Loma, CA
Replace Rv Roof Mira Loma, CA
Rubber Roof Installation Mira Loma, CA
Replace Rv Roof Mira Loma, CA
Rubber Roof Installation Mira Loma, CA
Repair Rv Roof Leak Mira Loma, CA
Rv Roof Repair Service Near Me Mira Loma, CA
Rv Slide Out Roof Repair Mira Loma, CA
Rubber Roof Installation Mira Loma, CA
Best Rv Roof Repair Mira Loma, CA
Rv Trailer Roof Repair Mira Loma, CA
Rubber Roofing For Rv Mira Loma, CA
Repair Rv Roof Leak Mira Loma, CA
Rv Rubber Roof Maintenance Mira Loma, CA
Rv Roof Repair Fiberglass Mira Loma, CA
Rv Rubber Roof Repair Mira Loma, CA
Rubber Roofing For Campers Mira Loma, CA
Class C Rv Roof Repair Mira Loma, CA
Rv Slide Out Roof Repair Mira Loma, CA
Rv Roof Maintenance Mira Loma, CA
Rv Roof Repair Service Near Me Mira Loma, CA
Repair Rv Roof Leak Mira Loma, CA
Rv Rubber Roof Repair Mira Loma, CA
Rv Roof Repair Service Near Me Mira Loma, CA
Rv Rubber Roof Maintenance Mira Loma, CA
Rubber Roofing For Campers Mira Loma, CA
Rv Rubber Roof Repair Mira Loma, CA
Rv Slide Out Roof Repair Mira Loma, CA
Rv Roof Replacement Mira Loma, CA
Rv Roof Repair Fiberglass Mira Loma, CA
Repair Rv Roof Mira Loma, CA
Rv Rubber Roof Maintenance Mira Loma, CA
Best Rv Roof Repair Mira Loma, CA
Rv Roof Repair Service Near Me Mira Loma, CA
Resealing Rv Roof Mira Loma, CA
Rv Rubber Roof Repair Mira Loma, CA
Epdm Rv Roof Repair Mira Loma, CA
Rv Roof Leak Repair Mira Loma, CA
Rv Roof Leak Repair Mira Loma, CA
Replace Rv Roof Mira Loma, CA
Class C Rv Roof Repair Mira Loma, CA
Best Rv Roof Repair Mira Loma, CA
Rubber Roofing For Rv Mira Loma, CA
Rv Rubber Roof Replacement Cost Mira Loma, CA
Rv Roof Repair Near Me Mira Loma, CA
Near My Location Seo Marketing Mira Loma, CA
Around Here Seo For Law Firms Mira Loma, CA
OCRV Center
Table of Contents
- – Repair Rv Roof Mira Loma, CA
- – OCRV Center
- – Rubber Roof For Rv Mira Loma, CA
- – Rv Roof Leak Repair Mira Loma, CA
- – Rubber Roofing For Rv Mira Loma, CA
- – Rubber Roof For Rv Mira Loma, CA
- – Rubber Roof For Camper Mira Loma, CA
- – Rv Rubber Roof Repair Mira Loma, CA
- – Rv Trailer Roof Repair Mira Loma, CA
- – Rv Roof Repair Near Me Mira Loma, CA
- – Epdm Rv Roof Repair Mira Loma, CA
- – Rubber Roof For Camper Mira Loma, CA
- – Replace Rv Roof Mira Loma, CA
- – Rv Fiberglass Roof Repair Mira Loma, CA
- – OCRV Center
Latest Posts
Local Seo Marketing Company Rancho Cucamonga
Local Seo Marketing Services Placentia
Internet Marketing Service Rancho Cucamonga
More
Latest Posts
Local Seo Marketing Company Rancho Cucamonga
Local Seo Marketing Services Placentia
Internet Marketing Service Rancho Cucamonga