All Categories
Featured
Table of Contents
- – Rv Fridge Repair Near Me Villa Park, CA
- – OCRV Center
- – Rv Aluminum Siding Repair Villa Park, CA
- – Rv Ac Repair Near Me Villa Park, CA
- – Rv Repair Reviews Villa Park, CA
- – Rv Awning Repair Near Me Villa Park, CA
- – Rv Water Damage Repair Villa Park, CA
- – Motorhome Repair Shops Near Me Villa Park, CA
- – Rv Furnace Troubleshooting Villa Park, CA
- – Rv Repair Shop Villa Park, CA
- – Rv Blinds Repair Villa Park, CA
- – Rv Furnace Repair Near Me Villa Park, CA
- – OCRV Center
Rv Fridge Repair Near Me Villa Park, CA
Cover the area with the compound and sand it after it dries out. Always use steel screws and bolts to ensure your repair work hold up. Roofing patching compound can be applied over any kind of screws or bolts on your motor home's roofing system to stop them from leaking. Keep this in mind for any type of future remodellings or enhancements you might carry out.
These roofs can likewise spring a leakage around home windows or any other raised areas, such as ac unit. The most effective solution for repairing these is to use household roof covering finish. A prominent brand name is Kool Seal. Make sure to grab the grey range and not the white. Kool Seal is likewise known to push back the sun and cool your RV more successfully.
Virtually every scenario is special. Some prominent brands consist of CoFair Quick Roof, Gorilla Patch, and Flex Seal Tape. Fiberglass roof coverings call for an unique fiberglass fix tape. One item, called Eternabond, is extremely recommended for any type of roofing system. It comes in various sizes to manage various dimension splits. It is one of the easiest tapes to install and repels UV rays so it lasts longer.
The most typical kinds of RV roofing system products are ethylene propylene diene monomer (EPDM), polycarbonate polyolefin (TPO), polyvinyl chloride (PVC), fiberglass, aluminum alloy, and galvanized sheet steel. There is no right or wrong kind, but every one has its very own toughness and weak points. An recreational vehicle solution business can help you determine your roof covering type if you do not know it and supply customized care pointers.
Rv Aluminum Siding Repair Villa Park, CA
Ensure that the roof covering sealer is without splits, openings, or rips. You should additionally inspect the sides of the roofing to see if there is any damages around the moldings. From AC vents to roofing system rails, provide your motor home's roofing a comprehensive check to ensure that every little thing looks tidy, damage-free, and protect.
Cleaning up a RV roof covering is a pretty uncomplicated process. The real success lies in choosing the finest RV roof covering cleaning solution.
Eliminate the old sealant with a putty blade or razor. Use the sealant to any type of gaps or splits, along with bolts and seams. Wait for it to completely dry (usually 24-72 hours). It's constantly important to have moderate to significant indicators of damages addressed by a professional. Get In Touch With Leisure Coachworks in Fontana, CA, at (909) 428-6775 to link with a participant of our solution group.
Among the latest and most efficient solutions for repairing your RV's roofing system membrane is Ziollo RV Roofing System Sealer. This item is a fluid rubber sealer that can load fractures, stop leakages, and give a waterproof barrier for your motor home's roofing system. It's incredibly easy to use and dries to an adaptable, UV-resistant finish that can withstand severe climate condition.
Rv Ac Repair Near Me Villa Park, CA
Normal evaluations and timely repair work can help extend the life of your recreational vehicle's roofing, conserving you from costly substitutes down the line. Keep in mind, when it involves motor home roofing system repair services, timely activity is key. The quicker you deal with the damages, the less most likely it is to intensify in time. Experience leakage complimentary & durable repair services From $14.95 Made use of as a stand alone repair service or as component of a full recreational vehicle roofing system bring back.

Below are some photos of a task I did to repair roofing system rot on my fifth wheel camper. I selected to use this approach due to the fact that I could do it myself with my own sources and skills. Otherwise, a whole lot of equipment, consisting of the ladder and roofing shelf, the endcap and the filon external wall would have needed to be torn apart.
In truth, I favor it in this manner because I understand how the repair was done. Plus, I would have had to get it out, probably costing me thousands of dollars. I made use of items from The Rot Physician. I have no affiliation with the company. They were really helpful in discussing my alternatives and in describing the strategies to utilized their products.
I used a box knife to reduce the rubber roofing system in the edge. It possibly leaked from the time the device was new, as the roof covering was very soft in this corner, and we've been in drought conditions for 2 years.
Rv Repair Reviews Villa Park, CA
Folding back the rubber revealed the rotten area. Here I have actually currently removed what soft decomposed timber I might with my bare hands. Next I reduced a diagonal with a keyhole attended tidy up the side where it was feathery from rot. 3. I reduced a piece of plywood like a puzzle to match the shape of the hole I made in the roofing.
Absolutely nothing fancy right here. 4. Here's the sprayer I made use of to use the CPES * from The Rot Physician. With its 18 metal "stick" I might probe into the 2 area in between the roofing system and the ceiling. I additionally put the wand down right into deep space in between the wall and the external filon to saturate the structural participants with CPES *.
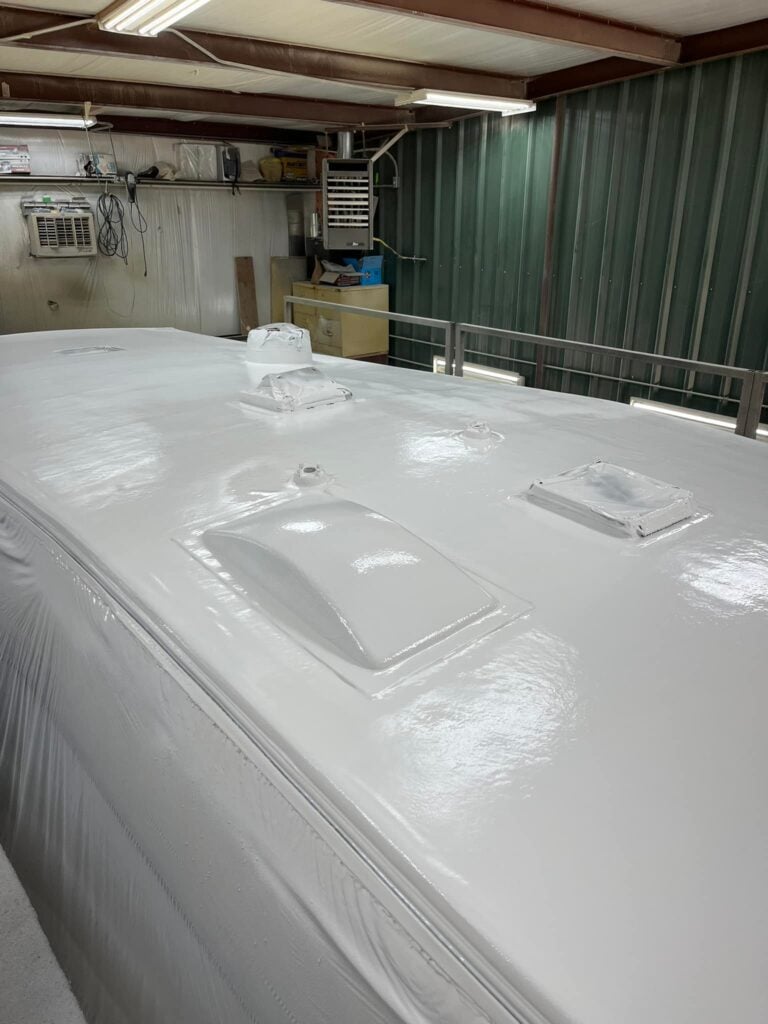
6. Below's the completed roofing system sealed up with Eternabond tape. I ran a strip of Eternabond right across the camper where the roof covering meets the endcap. Any concerns of a leak below are a distant memory. 7. I likewise had rot in the wall surface straight listed below the location on the roofing.
I thoroughly dried out the area for a number of days utilizing the exhaust side of a little vacuum cleaner, placing the hose in between the inner and external wall surfaces. When it was extensively dry I covered whatever with CPES *, making use of the insect sprayer to penetrate into otherwise inaccessible locations.
Rv Awning Repair Near Me Villa Park, CA
I spread out Fill-It Epoxy Filler * throughout the area. Not quite, however after that it will be covered up later. The things goes on like a thick and sticky gel, after that dries out to an extremely difficult material that bonds to the CPES * I had splashed onto the wood.
Finally, here's the ended up product. Total cost had to do with $200.00 plus numerous hours of my time. * These products are inaccessible, we are selling comparable items that will certainly carry out these same tasks. Feel complimentary to call us if you require support with which items to utilize.
Rv Water Damage Repair Villa Park, CA
Among the most vital skills you can grasp for preserving your recreational vehicle is roofing fixing. It's easy to disregard damage to a recreational vehicle roof, yet it is just one of the most essential facets of camper upkeep. A lot of individuals that have been RVing for any kind of length of time have actually come to be accustomed to the reality that they will need to do some maintenance and repairs on their own at some point.
When it involves delaying RV repair and maintenance, one of the most awful things that can occur is water damage. When there's an issue with your roofing system, it happens rapidly. Water damage can be stayed clear of or decreased by repairing the leakage yourself. Apart from that, there's a feeling of achievement in doing things oneself.
These can wear away the roof covering material gradually, damaging it. There are cleansers designed especially for RV roofs and each kind of product (Rv Aluminum Siding Repair Villa Park). If you're dealing with a large area, tape off the rest of your recreational vehicle and cover it with plastic to stop roof cleaners or sealants from leaking down the sides
Another point that all motor home roofs share is the sort of repairs that they can call for. The sealer, joints, and patch openings and slits are the 3 items you might fix. If your EPDM or TPO rubber roof covering seems half-cracked or milky, a fresh layer of sealer is what it needs.
Motorhome Repair Shops Near Me Villa Park, CA
When purchasing the rubber roof covering coatings or sealers, maintain your RV's measurements in mind to guarantee you get the appropriate quantity. After washing the whole roof covering and allowing it to dry, use a layer of paint to the roof covering making use of a roller. See to it to read and comply with the instructions on the sealer package for optimum prep work.
A patch will certainly be needed if you discover a tiny slit or tear on your recreational vehicle roof covering. Suppliers have produced repairs and Recreational vehicle roofing adhesives that are simple to use and resilient. Most spots require little preparation other than cleaning up the broken location and applying the patch over it, a lot like a band-aid.
Fiberglass roofs' leading layer, like RV rubber roofings', can oxidize with time, providing a half-cracked, milky look. Scrape off any type of loose, crinkled sections of the finishing prior to cleaning and sand the roofing system's surface area utilizing fine to medium grit sandpaper afterwards. The finishing will certainly cling better to a somewhat abraded surface area.
After the area has been smoothed and cleaned, include fiberglass spots and glue layer by layer, as directed by the repair package - Rv Aluminum Siding Repair Villa Park. At the end, layer your motor home with a sealer to the project and refinish the location as needed. The resealing of aluminum and various other metal recreational vehicle roofing systems is done with a specific finishing made for a light weight aluminum roof covering material
Rv Furnace Troubleshooting Villa Park, CA
The simplest method to fix a metal roofing with more serious damages is to replace the metal panel, which is a procedure that may vary based upon your recreational vehicle. You might be able to fix your steel roof covering making use of a peel-and-stick patch depending upon the level of the damages. See to it you select one that is specifically planned for metal roofings, as the adhesive chemistry differs.
The thought of replacing your recreational vehicle's roof covering might be on top of your possible RVing headaches. The entire procedure can be complicated, pricey, and time consuming. Nonetheless, if you go in recognizing what to expect, it will certainly be much less demanding, and you'll end up with a glossy brand-new roof covering providing comfort out on the roadway.
Fortunately, my Recreational vehicle roof covering substitute went easier than I prepared for. How do you understand if your roofing requires to be replaced?
Rv Repair Shop Villa Park, CA
Inside damage is a feasible indicator. Check along your ceilings and walls for soft spots that might indicate wetness or water leaks. Look for bubbles in the wall surface treatments. Ceiling discolorations or patches of mildew or mold and mildew can also suggest water breach. If you locate any interior damage, the next step is to recognize the source of the leakage.
If you have damage to your RV roofing, a professional must establish whether you're better off repairing or changing the roof covering. Roof covering replacements are expensive yet give both value and tranquility of mind.
If somebody else has actually crashed right into your motor home, their insurance coverage might possibly cover the substitute. If your warranty or insurance coverage doesn't cover your roofing system substitute, you will certainly need to spend for it expense. If a warranty or insurance covers the expense, you'll just need to pay the amount of your deductible.
This applies to various other circumstances where damage happens, usually while the recreational vehicle isn't in procedure, such as storm damages. Your future insurance coverage rates may not increase if you're found not to be at mistake. Unless you're remarkably helpful, you'll likely need to find a specialist to change your motor home roofing.
Rv Blinds Repair Villa Park, CA
I opted to surf Google and Facebook reviews for regional fixing firms. I likewise asked my insurance policy supplier for suggestions. After discovering a service center, we left our traveling trailer for a preliminary assessment. The service technician offered a quote to our insurance provider. In this instance, the insurance coverage really did not send an adjuster out for an in-person inspection, yet some companies need you to have an insurance adjuster consider your motor home roof to confirm the damages.
From there, the roofing system technician only supplied one kind of roof covering, so we really did not have any type of decisions to make. It might take numerous weeks or months to get your Motor home's roof replaced.
After a couple of short weeks, our roof substitute was total. Our insurance provider paid the shop straight for whatever apart from our deductible. It was honestly a a lot easier procedure than I envisioned. I was grateful to have a good regional agent and a nationwide firm as a provider. A full motor home roof covering substitute usually costs several thousand dollars.
Physical impact damages from tree branches, rodent or animal damages, absence of upkeep, typical aging, glue failing, water damages and air intrusion. California motor home Professionals we'll work directly with your insurance provider to make the procedure as pain-free as feasible. A straight time procedure, whether it is for diagnosis, repair service(s), or some other weird condition, are labor rates that are subject to change.
Rv Furnace Repair Near Me Villa Park, CA

I'm in The golden state, and the Motor home repair centers in my area cost anywhere in between $185 $225 per hour. Additionally, not all Motor home roof replacements are the exact same.
The price of the roofing system replacement additionally depends on how substantial the damages is. Some RV roof covering substitutes can be done without having to replace the timber sheeting underneath the roof membrane, while others will certainly need new sheet. It is a common practice for repair work facilities to supplement your insurer.
OCRV Center
Address: 23281 La Palma Ave Yorba Linda, CA 92887Phone: (714) 909-1444
Email: [email protected]
OCRV Center
A roof covering replacement is simply that, a substitute of the Recreational vehicle roof covering. All products on the roof covering are eliminated (A/Cs, vents, TV antenna, satellite, skylights, and so on).
The Rv Repair Centre Villa Park, CARv Water Damage Repair Villa Park, CA
Rv Furnace Repair Near Me Villa Park, CA
Rv Electrical Repair Villa Park, CA
Repair Rv Villa Park, CA
Rv Furnace Repair Near Me Villa Park, CA
Motorhome Roof Repair Villa Park, CA
Rv Furnace Repair Villa Park, CA
Local Rv Repair Villa Park, CA
Rv Repair Shop Villa Park, CA
Rv Awning Repair Villa Park, CA
Rv Awning Fabric Repair Villa Park, CA
Rv Awning Repair Villa Park, CA
Rv Repair Near Me Villa Park, CA
Motorhome Repairs Villa Park, CA
Awning Repair Rv Villa Park, CA
Rv Specialists Villa Park, CA
Recreational Vehicle Repair Villa Park, CA
Rv Awning Fabric Repair Villa Park, CA
Recreational Vehicle Repair Villa Park, CA
Rv Refrigerator Repair Villa Park, CA
Rv Repair Reviews Villa Park, CA
Rv Awning Repair Near Me Villa Park, CA
Rv Water Damage Repair Villa Park, CA
Rv Electrical Repair Near Me Villa Park, CA
Rv Awning Fabric Repair Villa Park, CA
Rv Aluminum Siding Repair Villa Park, CA
Rv Electrical Repair Near Me Villa Park, CA
Rv Ac Repair Near Me Villa Park, CA
Motorhome Repair Shops Near Me Villa Park, CA
Rv Refrigeration Repair Villa Park, CA
Rv Electrical Repair Near Me Villa Park, CA
Rv Specialists Villa Park, CA
Rv Awning Fabric Repair Villa Park, CA
Local Rv Repair Villa Park, CA
Rv Repair Reviews Villa Park, CA
Rv Blinds Repair Villa Park, CA
Rv Aluminum Siding Repair Villa Park, CA
Rv Furnace Troubleshooting Villa Park, CA
Rv Electrical Repair Villa Park, CA
Repair Rv Awning Villa Park, CA
The Rv Repair Centre Villa Park, CA
Rv Fridge Repair Near Me Villa Park, CA
Rv Ac Repair Near Me Villa Park, CA
Rv Furnace Repair Near Me Villa Park, CA
Rv Furnace Repair Near Me Villa Park, CA
Rv Electrical Repair Villa Park, CA
Rv Fridge Repair Near Me Villa Park, CA
Rv Repair Reviews Villa Park, CA
The Rv Repair Centre Villa Park, CA
Rv Electrical Repair Near Me Villa Park, CA
Rv Repair Shop Villa Park, CA
Replacement Rv Awning Villa Park, CA
Rv Furnace Repair Near Me Villa Park, CA
Repair Rv Villa Park, CA
Replacement Rv Awning Villa Park, CA
Rv Awning Repair Villa Park, CA
Rv Repair Shop Villa Park, CA
Rv Repair Reviews Villa Park, CA
Repair Rv Awning Villa Park, CA
Motorhome Repairs Villa Park, CA
Rv Repair Reviews Villa Park, CA
Rv Furnace Repair Near Me Villa Park, CA
Rv Repair Near Me Villa Park, CA
Rv Awning Fabric Repair Villa Park, CA
Motorhome Repairs Villa Park, CA
Rv Repair Near Me Villa Park, CA
Rv Refrigerator Repair Villa Park, CA
Local Rv Repair Villa Park, CA
Rv Electrical Repair Near Me Villa Park, CA
Rv Ac Repair Near Me Villa Park, CA
Awning Repair Rv Villa Park, CA
The Rv Repair Centre Villa Park, CA
Rv Furnace Troubleshooting Villa Park, CA
Rv Furnace Repair Near Me Villa Park, CA
Rv Refrigerator Repair Villa Park, CA
Rv Repair Near Me Villa Park, CA
Rv Furnace Repair Villa Park, CA
Finding A Good Local Seo Near Me Villa Park, CA
Near Here Seo Marketing Company Villa Park, CA
OCRV Center
Table of Contents
- – Rv Fridge Repair Near Me Villa Park, CA
- – OCRV Center
- – Rv Aluminum Siding Repair Villa Park, CA
- – Rv Ac Repair Near Me Villa Park, CA
- – Rv Repair Reviews Villa Park, CA
- – Rv Awning Repair Near Me Villa Park, CA
- – Rv Water Damage Repair Villa Park, CA
- – Motorhome Repair Shops Near Me Villa Park, CA
- – Rv Furnace Troubleshooting Villa Park, CA
- – Rv Repair Shop Villa Park, CA
- – Rv Blinds Repair Villa Park, CA
- – Rv Furnace Repair Near Me Villa Park, CA
- – OCRV Center
Latest Posts
Evaporative Cooler Replacement Pasadena
Commercial Kitchen Hood Service Alhambra
Ac Troubleshooting North Hollywood
More
Latest Posts
Evaporative Cooler Replacement Pasadena
Commercial Kitchen Hood Service Alhambra
Ac Troubleshooting North Hollywood